Mexican Chili BBQ Sauce

Mexican chilies are an amazing and versatile ingredient to have in your pantry. However, many Canadians are unfamiliar with how to make use of them in their cooking. Here’s a simple recipe for homemade Mexican Chili BBQ sauce that I hope will inspire you to try them out. Best of all, you can buy hard-to-find Ancho chilies and Guajillo chilies direct from Bluewater Pepper Farm or at one of our retail partners in Huron County.
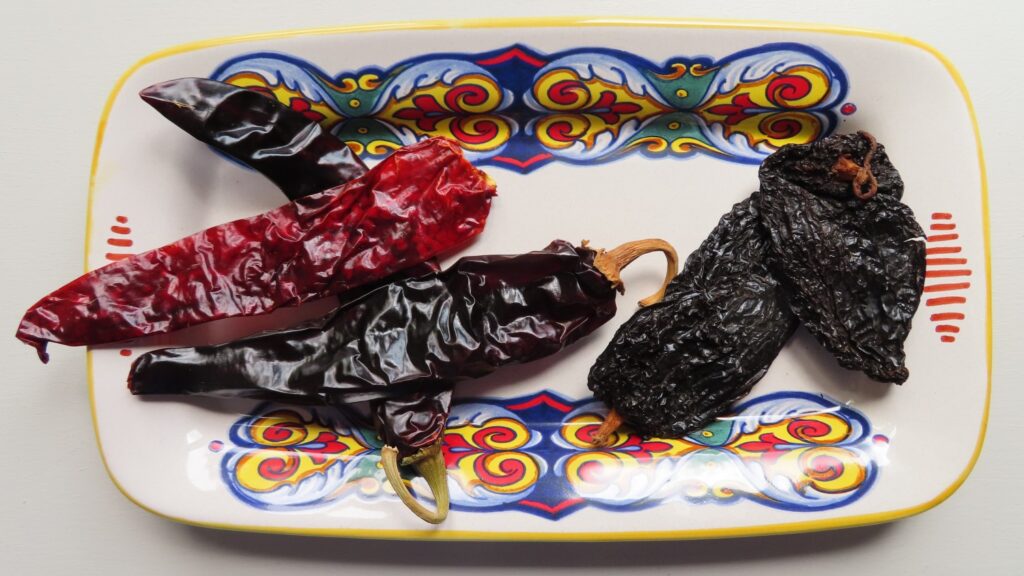
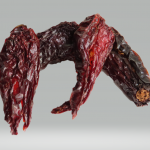
Guajillo and Ancho chilies

This BBQ Sauce is great on grilled chicken or pork, as a dressing for grilled chicken wings, and it lends authentic Mexican flavour to your taco filling — shredded chicken, beef, pork or even tofu. Spice it up even more with one of our fermented hot sauces, Hellfire Habanero, Chipotle Madness or Cranny Pepper Sauce.

When most of us hear the word “chilies”, we often assume that equates with hot and spicy. While that’s often the case, many popular Mexican chilies are quite mild. By combining different chilies in your cooking, you can find the right heat level.

You can make this delicious BBQ sauce using spices and ingredients you likely have on hand or easily find with the exception of the chilies, Mexican oregano and chipotle powder, which you can buy from our store.

BBQ Sauce ingredients Archives – Bluewater Pepper Farm

For a dead simple version, you can even start with regular ketchup – more about that later.

Some basics for using Mexican chilies in your cooking

First off, chilies are harvested when ripe and then dried (often smoked too), resulting in leathery pods produced by the ton in Mexico. Dehydration serves to concentrate the flavours and ensures the chilies store well at room temperature.

When used in cooking they’re added to sauces, or ground into powder. Here are a few general techniques (though no rule is cast in stone).
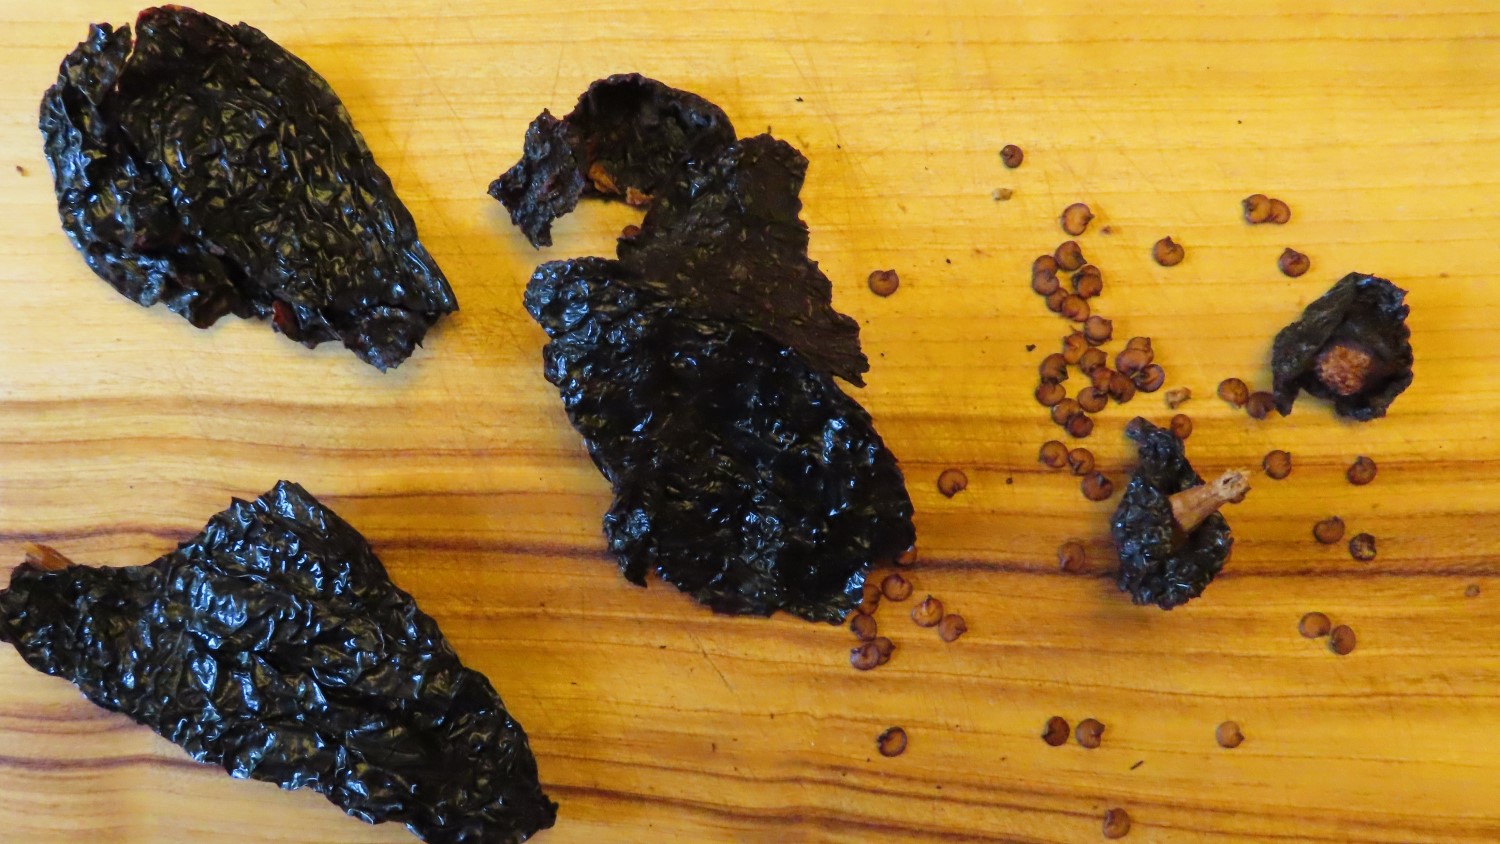
Anchos, stems and seeds removed
Just tear your chilies into pieces and discard the stem.

Lightly toast the chilies to bloom the flavours. Do this whether making a sauce or powder. Remove the stems and discard. You can keep the seeds and stringy pith, or toss them. Just remember those are hotter than the rest of the chili. Tear chilies into pieces. Toast for a minute or so in a hot skillet, pressing them down with your spatula and flipping once. Be careful not to burn them – there shouldn’t be any smoke.

Make powder by grinding up the toasted chilies in a spice / coffee grinder. Use the powdered spice in meat rubs, soups, sauces, etc.

If you’re using the chilies to make a sauce, then soak them by covering with some boiling water. Weigh down the chilies to ensure they’re submerged and soak for 20 or 30 minutes. The liquid and the chilies go right into the pot from there.

Of course, this is just the very basics. You’ll find tons of inspiring recipe ideas by searching the web.

Anchos or Guajillos?

Ancho Chilies are a sweet, mild and smoky chili that may be the most widely used in Mexican cuisine. They are a large, meaty chili, made from ripe poblano peppers. Guajillo’s are dark red colour with a thin wall and shiny skin when dried. They have an earthy flavour with tones of tea. Guajillos are hotter than Anchos, but nowhere near jalapeños or habaneros, especially if you remove the seeds. In Mexico, you’ll find both these chilies everywhere, even in corner stores.

You can make this BBQ sauce using either type, or try a combination of the 2. And, since it’s BBQ sauce, you can be as creative as you want. Remember to keep a balance of salt, sweet, vinegar and heat but after that, you can try adding or substituting other spices and flavours. Some good candidates are black pepper, cinnamon, nutmeg and tamarind.

A final note, the recipe calls for Mexican whole leaf oregano, also hard-to-find in Canada, but also available here from our shop. This type of oregano is used throughout Latin America, so if you want authentic, give it a try. It has a slightly stronger flavour, but can be used in place of Mediterranean oregano in cooking.

Ancho Chili BBQ Sauce

Make this delicious and versatile BBQ sauce using Mexican chilies and oregano, either mild or spicy. This recipe stores well in the fridge for a few months.
Course condiment
Keyword BBQ sauce, Mexican chilies, Mexican oregano
Prep Time 1 hour 30 minutes
Cook Time 1 hour

Equipment

  • 3 qt sauce pan
  • small, heavy skillet (for toasting chilies)
  • blender or food processor
  • Storage jars – makes about 1 quart

Ingredients

  • 2 whole Ancho Chilies approx 1 ounce
  • 3 whole Guajillo Chilies
  • 1/2 cup boiling water for soaking chilies
  • 1 tbsp Mexican whole leaf oregano you can substitute regular oregano
  • 1 tsp Hot Smokey Chipotle powder Adjust amount of chipotle to calibrate the heat level as follows: mild – no chipotle, medium – 1/2 tsp, spicy – 1 tsp or more. You can always add more, but you can't take it out!
  • 1 tsp granulated garlic or garlic powder
  • 1 tsp ginger powder
  • 4 whole cloves
  • 1 tsp whole allspice
  • 1 tsp salt adjust to taste at the end
  • 1 20 oz can tomatoes (crushed, whole or diced)
  • 1 medium onion, roughly chopped
  • 2 tbsp soy sauce be sure to use gluten free if that's an issue
  • 3 tbsp cider vinegar you can another type of vinegar – be sure to avoid malt vinegar if you require gluten free
  • 1/2 cup maple syrup or brown sugar

Instructions

  • Rip the chilies into 1 or 2 inch pieces. Discard the stem. Whether or not to use the seeds is a personal choice. They add more heat and a slightly more bitter taste to the final product that many people like – it's up to you.
  • Have your boiling water ready.
    Keep a close watch as you toast – you don't want to burn them! Place the chilies In a medium hot skillet in a single layer. Press down with a spatula to get an even toasting, and flip over once or twice. You should see them start to 'sweat' a bit, but not smoke. This shouldn't take much more than a minute.
    Place the toasted bits into a measuring cup and pour about 1/2 cup boiling water on top. Submerge them using a drinking glass to weigh them down. Let the chilies soak for 20 minutes or so.
    Toasting anchos in a skillet
  • Place all the other ingredients in your saucepan and bring up to a boil on medium-high heat. When the chilies are done soaking, add them to the pot, along with the soaking liquid.
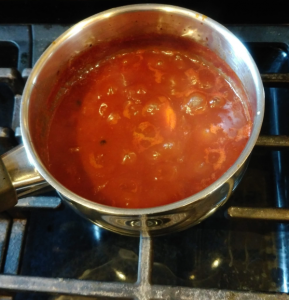
    All ingredients in saucepan
  • Reduce heat to simmer. Allow to simmer for 1 hour, stirring regularly, scraping down the side of the pot each time. You want it to be about as thick as ketchup, so add water or cook a bit longer to get it where you like.
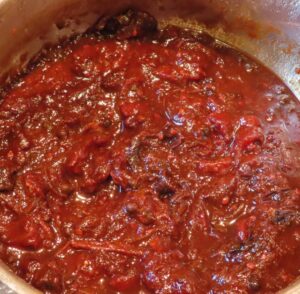
    Allow to cool before blending
  • Carefully tip the pot into a blender or food processor bowl. Whiz it on high for a minute or more until it's completely smooth in texture and the whole spices are ground up.
    Adjust salt to taste. Remember, condiments should be a little salty.
    Pour into a 1 qt jar and store in the fridge. This will keep for a few months.

Now for the ketchup version. . . Ketchup is a great base for BBQ sauce because it’s already sweetened and nicely seasoned with spices. First, toast and soak the chilies as above. Next, in a 3 qt saucepan, combine 2 cups ketchup, the chopped onion and soy sauce. Since ketchup is already fairly acid, add just 1 tbsp cider vinegar. Once the chilies have soaked, add them along with the liquid. Bring it to a boil, then reduce to a simmer. Cook until it reaches the desired consistency. Allow it to cool before whizzing it up – an immersion blender works fine with this recipe because it doesn’t need to grind up whole spices. Finally, adjust the salt to taste. It will keep for a month or so in the refrigerator.

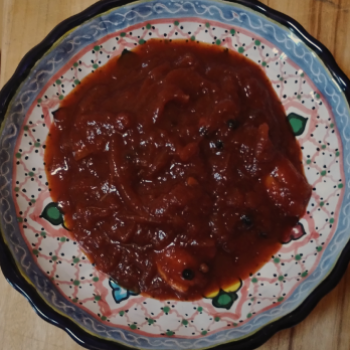
Try Chipotles in Adobo for big Mexican flavour

You haven’t really tried Mexican food until you’ve used the fiery condiment, Chipotles in Adobo. In this post, I’ll show you how you can make a very nice version using my Bluewater Pepper Farm Hot Smokey Chipotle.

What exactly are chipotles in adobo? In an earlier post, What is Chipotle?, I explained the transformation from ripe jalapeños to smoked and dried chipotles. To make this adobo, whole chipotles are re-hydrated and simmered long and low in a tomato, vinegar, garlic and onion sauce. The result is a tangy, sweet and smoky condiment that can be added to many of your favourite dishes.

There are canned chipotles in adobo that are very good, but they’re not widely available in Canadian supermarkets. This adobo recipe uses my chipotle powder in place of whole chipotles which are also hard to find. I’ve made this using both whole and ground chipotles to compare the flavour. It’s hard to tell the difference when I use it in other dishes or sauces.

While I prefer to use canned tomato purée, ketchup makes a decent substitute.

There are many different ways to use this versatile dressing, whether in marinades, sauces, braises or on it’s own as a condiment. Keep reading for 5 ideas that follow the recipe.

Easy Chipotles in Adobo

Make this versatile Mexican ingredient using my Hot Smokey Chipotle powder instead of whole chipotles which can be difficult to find here in Ontario. This recipe yields about a cup. Most recipes that use chipotles in adobo as an ingredient only call for a few tablespoons so a cup will go a long way. With the vinegar content and being free of oil, it will last in the fridge for a month or more.
Course condiment
Cuisine Mexican
Keyword chipotle in adobo, Hot Smokey Chipotle powder
Prep Time 10 minutes
Cook Time 1 hour
Total Time 1 hour 10 minutes
Servings 1 cup

Ingredients

  • 1 cup canned tomato purée Substitute 1/2 cup of ketchup
  • 2 tbsp maple syrup or another sweetener Omit this if you're starting with ketchup.
  • 1/4 cup cider vinegar While cider vinegar is the classic Mexican ingredient, just substitute white vinegar if you don't have it on hand.
  • 1 tbsp Bluewater Pepper Farm Hot Smokey Chipotle powder If you have them, use 6-8 whole chipotles, soaked in hot water for 15 – 30 minutes.
  • 1 tsp whole black peppercorns
  • 1/4 to 1/2 tsp salt
  • 1/2 medium onion, sliced very thin Use a mandolin for perfectly uniform, thin slices fast (just be careful!)
  • 4 garlic cloves, peeled and roughly chopped Use cloves whole or crushed if you prefer.
  • 1/2 to 1 cup water You'll need to add more water if you use ketchup.

Instructions

  • Whisk the tomato, vinegar, chipotle powder and a little water together in a small saucepan and bring up to a boil. Use about 1/2 cup water if you're starting out with ketchup.
  • Stir in the sliced onions, garlic and peppercorns, return to a boil, then reduce to a gentle simmer for 60 minutes or so. Stir often and add water to keep it from getting to thick. Since we are using chipotle powder, you could reduce the cooking time if you need to, but it really does benefit from a long slow cook.
  • You'll want to end up with a consistency a bit thicker than ketchup, so keep that in mind and add water accordingly as it cooks.
  • Once it's simmered a while and reached the right thickness, remove the pot from the heat and allow it to cool completely.
  • Use some right away and store the rest in a container in the fridge for a month or more.

Notes

The aroma alone is enough reason to make this staple of every Mexican kitchen! 
Chipotles in adobo are usually made using whole chipotle chilies that are re-hydrated and slow simmered with tomato, vinegar, garlic, onion and black peppercorns.  This recipe is essentially the same thing but using ground chipotle powder instead.

Here are 5 simple ways to enjoy Chipotles in Adobo . . .

Adobo translates to English as “dressing”, and as that word implies it’s something you combine with other ingredients or add to dishes.

  1. Make a BBQ sauce. Combine 1/3 cup chipotles in adobo with 2/3 cup of ketchup then add mustard and maple syrup (my favourite) and a little more vinegar to taste. You can be creative with BBQ sauce as long as you maintain a nice balance of sweet, acid and spices. Add garlic and ginger (fresh grated or powdered), honey, lime or lemon juice. This will taste great on anything grilled – slather it on as you finish grilling to get a little caramelization.
  2. Taco sauce. Combine roughly equal parts chipotles in adobo and mayo and add a little sour cream or yogurt. Plop a spoonful on a taco or a burger, but be careful, you might just eat the sauce by itself.
  3. Add a few tablespoons of chipotles in adobo to a batch of chili con carne to lend awesome barbecue flavour.
  4. Stir-fry sauce. Combine chipotles in adobo and water. Saute seasoned, cubed chicken breast, shrimp, beef strips, pork, tofu or any protein you like. When nearly finished, toss in the sauce to finish cooking. Make it
  5. Add a few tablespoons of chipotles in adobo to your marinades. I like to add some to my marinade for oxtail pieces when I make the Jamaican standard, oxtail stew.

One more thing, I highly recommend the cookbook Everyday Mexican by renowned chef and student of Mexican cuisine, Rick Bayless as a starting point for cooking with Mexican ingredients (of course chipotle, but so much more). In fact, pick up any of his cookbooks, and you’ll be inspired to cook more Mexican!

Roasted Poblanos

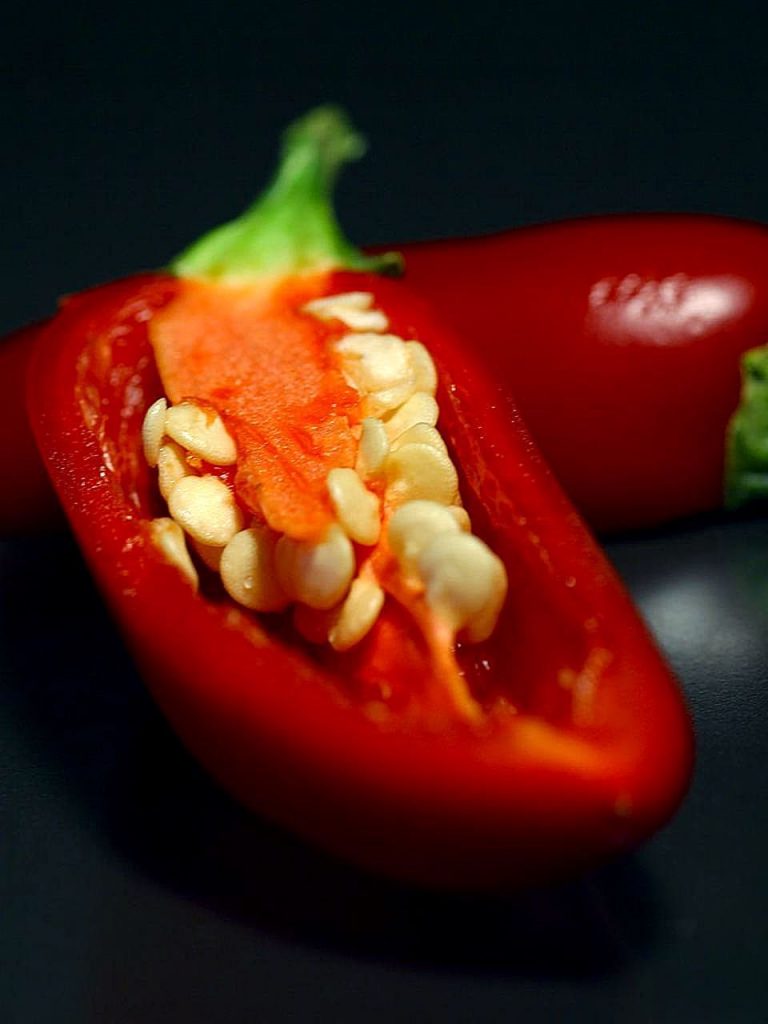
At this time of year, there’s always a surplus of peppers from the garden. This year my poblanos are the star, providing 5 pounds this past week from just 4 plants.

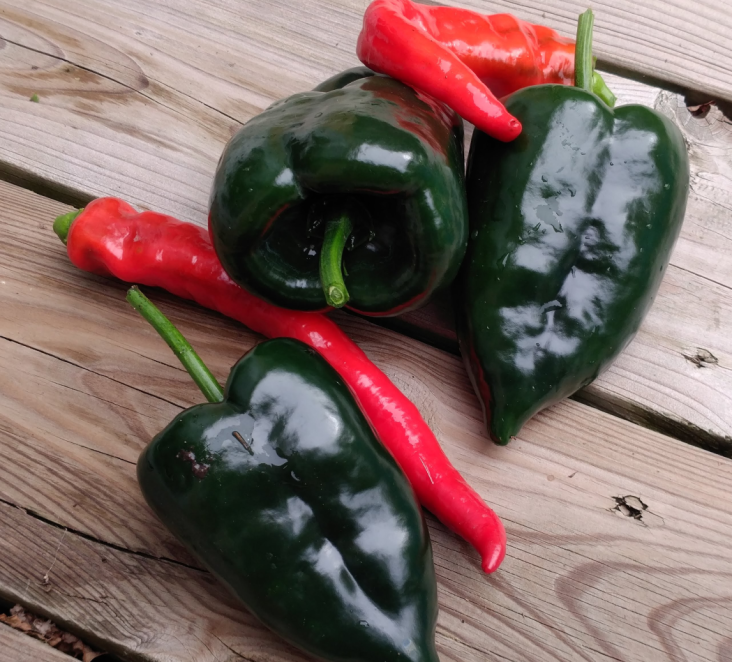
Poblanos galore!

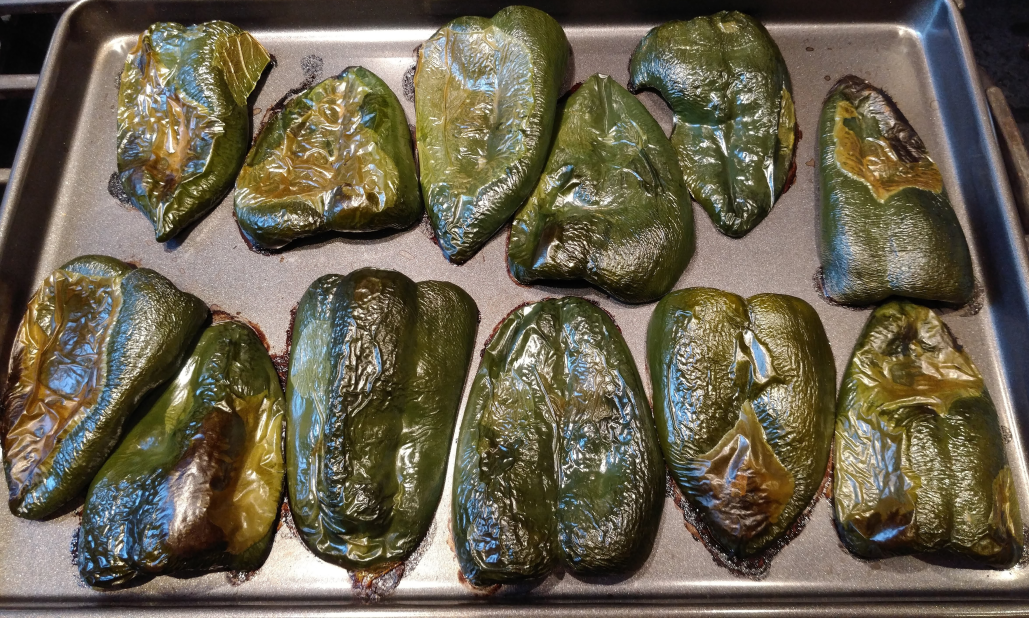
Poblanos are a versatile, mildly hot and flavourful addition to soups, stews, casseroles and many other dishes so I really hate to waste them. What to do? In this post, I’ll share a simple way to roast, skin and freeze them so you can enjoy these beauties year-round. This method works well with any thick-walled pepper including sweet bells.

Start with the freshest peppers you can get – ideally picked from your own garden but they’re cheap to buy at farmers markets in season too. While many people like to use a gas grill or even a fire, I prefer to use my oven as it’s much easier to ensure even heat without too much charring.

The process is simple . . .

  • Pre-heat your oven to 450 F
  • Cut the washed peppers in half, removing the seeds and pith
  • Tear off a sheet of parchment paper or foil to cover a baking sheet (you can go without, but you’ll have more cleanup at the end)
  • Arrange the peppers skin side up in a single layer and pop them in the oven for 20 to 25 minutes
  • The high heat will blister the skins making them easy to peel
  • Remove from the oven and let cool for a couple of minutes
  • Place the warm peppers in a covered bowl or seal tightly in a paper bag and allow to cool completely – (don’t throw out that parchment paper)
  • Once they’re cool, you should be able to peel the skins off quite easily. It’s a little fiddly, but it goes quickly once you get the hang of it. Don’t worry about removing every bit of skin
  • Next, arrange the peeled peppers on the baking sheet in a single layer on parchment (reuse the piece you used for roasting) and place in the freezer until they’re frozen solid. This individual freezing step is important so you can conveniently get out one at a time and avoid having them freeze into a solid block!
  • Pop them in a zip-lock bag, label and store in your freezer.

I love to hear your feedback, so post a comment here or share this with your friends on social media. You can also sign up to receive email updates whenever I add a new post – simply fill in the form on this page with your name and email and click subscribe.

Pepper seedlings in soil blocks!

Minimize transplant shock and eliminate plastic pots by starting your veggie seeds in soil blocks

Well, it’s been an extra long Spring in this part of the country with cool, wet weather extending into June. As a result, the growing season is 2 or 3 weeks behind. Despite that, I planted out 7 varieties of baby peppers this past weekend – I’m hoping for the best.

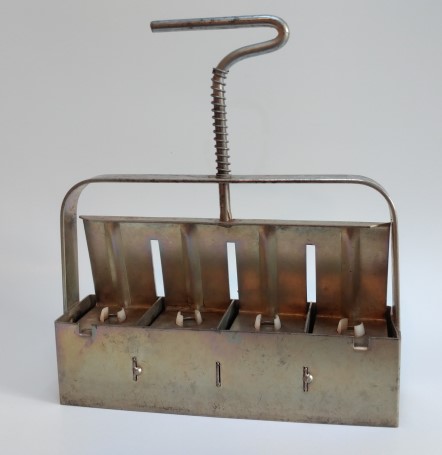
My block-making tool. It presses out four 2″ cubes at a time.

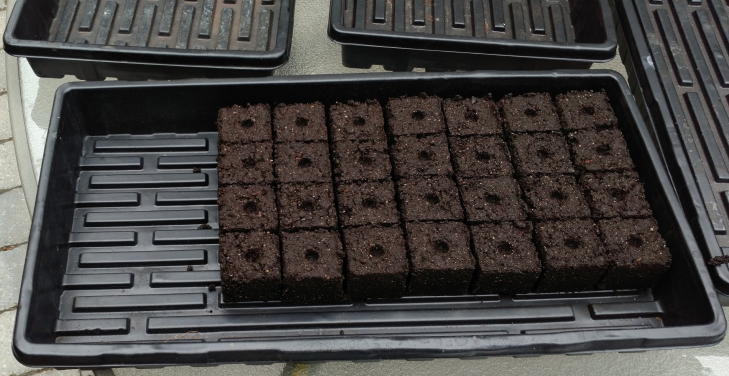
When it comes to seed starting, I’ve been a devoted fan of soil blocks for several years now. If you’re wondering what a soil block is, it’s pretty much what the term implies – 2″ cubes of soil with a dimple on top where you drop the seed. Using a simple block-maker tool and the right soil mixture, I can crank out a flat in no time. Give them good lighting, moisture and a little time and voilà, I can start 45 plants in a standard seed flat. This technique has lots of advantages . . .

If you liked making mud pies as a kid, this is the perfect hobby!

First, you don’t need any plastic pots. All you require is the flat to hold your blocks. This is huge for me – I really don’t want my hobby to burden the earth with more plastic waste.

The second big benefit comes when you plant them out – you just drop the cube directly into your garden. There’s very little transplant shock as the seedlings are still rooted in the soil they started in.

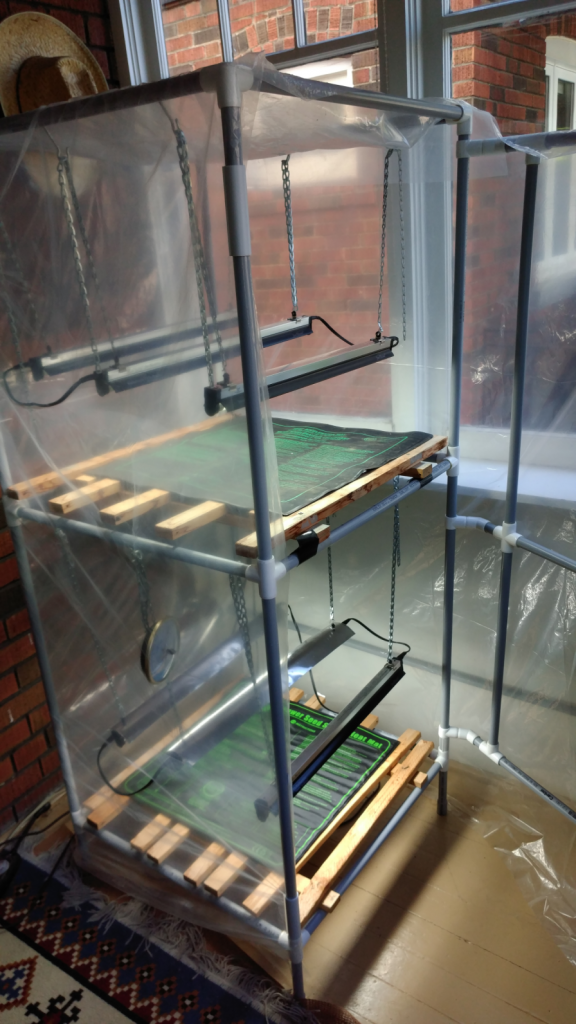
Yep, this is the greenhouse.

While growing in the blocks, the seedling roots just grow out to the edge of the block and then pause – this is called “air pruning”. However, as soon as you plant them into the ground, those roots pick up where they left off. This contrasts with seedlings started in pots where the roots often grow into a dense mat at the bottom and need to be broken up when you plant them, resulting in transplant shock.

I use a home-made “greenhouse” kitted out with heat mats and grow lights on timers to get things started. It doesn’t look like much, but it can handle 4 flats at a time giving me more than enough capacity to fill my raised beds at the lake.

I’ll share more info on soil blocks in later posts. Meantime, here are a few pix of the pepper seedlings’ 5 weeks in the greenhouse taken with my web-cam.

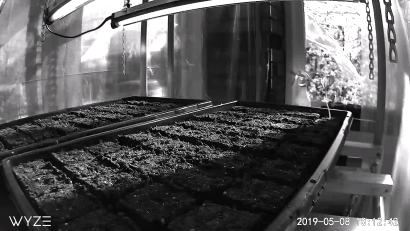
Day 4 – no action yet
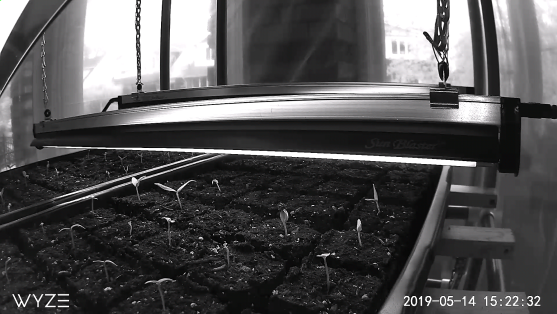
Day 10 – the seeds are sprouting nicely
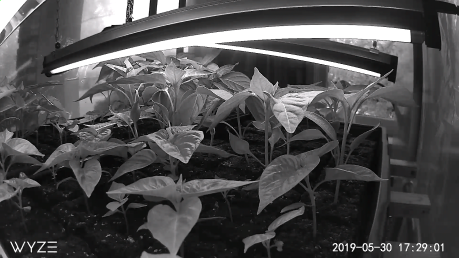
This is just shy of 4 weeks – May 30, 10 days before they hit the garden

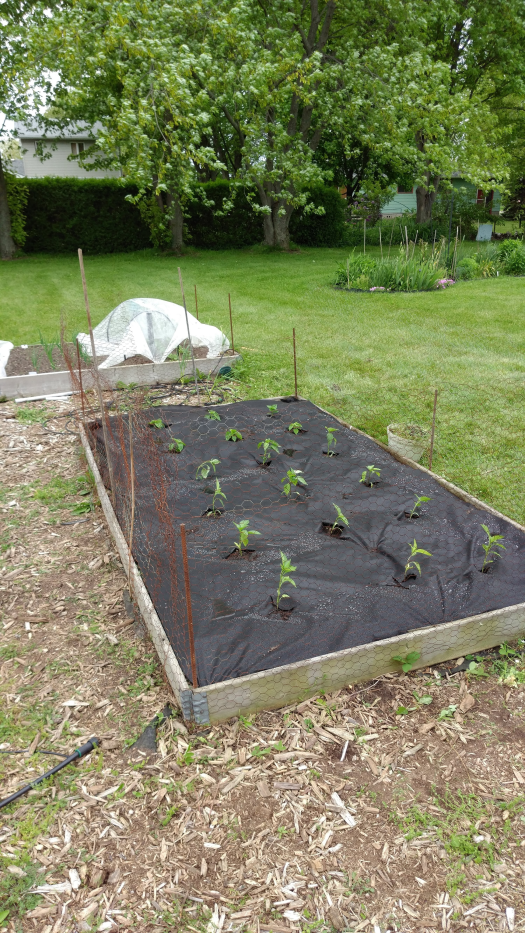
And here they are – waiting for some hot weather now! The chicken wire defends against groundhogs and rabbits.

Raised beds are ideal for growing peppers and lots of other veggies too.

Capsaicin, the heat in your pepper

Over 200 years ago, a chemist named Christian Friedrich Bucholz succeeded in isolating capsaicin. Pronounced cap-SAY-sin, it is the source of heat in your chilies. Since then chemists have figured out how to extract near 100% pure capsaicin extract from peppers. In 1930, chemists reported the first synthesis of the stuff. (Synthesis is the fancy term for replicating the chemical compound capsaicin without the need to grow peppers.) Today capsaicin is widely used in medications, pepper spray, rodent repellents and more. As I explained in an earlier post, we use the Scoville scale to measure the heat of peppers.

Why do chilies produce capsaicin in the first place? Well, scientists have observed some pretty clear benefits of being ‘hot’. First, they discovered capsaicin is irritating to mammals but not to birds. In the wild, birds help spread seeds around which is good for the chili plant. They tend not to crack small seeds open, so wherever they roost, the birds plant chili seeds at the same time. On the other hand rodents tend to chew up seeds, so they’re not going to sprout – bad for the chili plant.

I can personally attest to the effectiveness of hot peppers in repelling squirrels. We’ve tried many repellents in the past with limited success. However, last fall after planting a batch of spring bulbs, Tony spread my pepper sauce mash on the garden (mash is a by-product of fermented hot sauce making) . While the heat doesn’t hurt those fluffy tailed rats it sure ruined their appetite for our tulip bulbs!

Molecular structure of capsaicin C18h27nO3 (Wikimedia Commons)

The second benefit of capsaicin is due to it’s effect on a common fungus in chili plants – fusarium. That’s the same family of fungus that causes your tomato leaves to wilt in humid weather. Fusarium is quite common in soil and attacks many types of plant – in peppers, it is damaging to the seeds. It turns out that capsaicin limits the growth of the fungus which get inside the fruit when pests burrow through the pepper wall.

The placenta nurtures the seeds

The hottest part of the pepper is the placenta. Yes, peppers have a placenta too! It’s the light coloured pithy tissue where the seeds are attached inside the hollow pepper fruit. The seeds get all their nutrients through the placenta. You’ll often read advice to discard the seeds if you want less heat – well it’s actually the white bit that has the highest heat. The seeds are hot too, but not to the same degree.

Capsaicin is good for pepper plants – but is it good for people too?

It turns out capsaicin has many benefits to humans. The chili pepper spread rapidly around the globe after it was first retrieved from the New World by Columbus. It’s no coincidence that hot countries quickly adopted them into their cuisine because capsaicin helps prevent food from spoiling. It has both anti-bacterial and anti-fungal effects and, of course, they taste really good too. In times before refrigeration, this was a valuable property.

Another myth buster – hot peppers are good for digestion! It’s a common misconception that spicy food causes heartburn and stomach trouble, but in fact it’s the opposite. Capsaicin stimulates the production of saliva and gastric juices that improve your digestive performance. For those on a low FODMAP diet for IBS, chili peppers are just fine in moderate quantities. While many people (and physicians) believe spicy food is bad, I suspect it’s because those dishes often include lots of onion and garlic – 2 of the primary foods to be avoided on a FODMAP diet.

While capsaicin is the main source of heat, there are a handful of other, related compounds called capsaicinoids that also affect the chili burn. Because different types of chilies have varying levels of these compounds, humans have a range of reactions. Depending on the capsaicinoid mix, you might experience a delayed or immediate reaction, a brief burn or a lingering one, etc.

Fortunately, the heat we humans sense from capsaicin is a kind of false alarm. Capsaicin triggers receptors on your tongue that normally fire only with high temperatures or acid. However, the chili burn is harmless. Furthermore, after you eat a bit, you develop a tolerance for it and subsequent bites don’t have the same fire in them. Eat up and enjoy!

Sources and further reading

Smithsonian Magazine, What’s So Hot About Chili Peppers?, April 2009

Harvard University: Science in the News Blog, The Complicated Evolutionary History of Spicy Chili Peppers, Nov 2012

National Center for Biotechnology Information (NCBI), Harnessing the Therapeutic Potential of Capsaicin and Its Analogues in Pain and Other Diseases, July 2016

draxe.com, Cayenne Pepper Benefits Your Gut, Heart & Beyond , May 2018

bbc.com, How spicy flavours trick your tongue, January 2015

Wilbur Scoville’s heat scale

It’s impossible to read much about hot peppers without bumping into Wilbur Scoville’s scale.  In this post, I’ll explain Scoville Heat Units (SHU’s) and why you should care (but not too much).

Scoville scale creator
Wilbur Lincoln Scoville – 1865 – 1942

Back in 1912, American pharmacist Wilbur Scoville came up with a way to measure and compare the burning sensation one gets from eating hot chilies.  He enlisted tasting panels of 5 people to try samples of pepper essence diluted in water.  The number assigned indicates how much water is needed to eliminate the heat (the ratio of water to pepper).  

jalapeño Scoville scale
10,000 Scovilles is very hot for jalapeños. The little red square represents the quantity of jalapeño pepper while the blue shows the relative volume of water you need to add if you want to avoid any heat. That’s just a “medium” burn compared to peppers like habanero, scotch bonnet or ghost.

To illustrate, Tobasco tops out around 5,000 Scoville heat units. By coincidence, there are about 5,000 drops of water in a cup.  So that means it takes 1 cup of water to overcome the heat from 1 drop of Tabasco sauce.

A score of zero means no heat (think sweet bell peppers) while today’s hottest chilies score upwards of 2,000,000!  That translates to 1 drop in 100 litres of water.  For metric resistors, that’s 1 drop in 26 US gallons!

The SHU score is not very precise due to the differing taste buds of the testers plus the fact that the heat varies widely even between two peppers of the same species grown on the same plant. Different parts of the same pepper also deliver wildly different heat! That’s why you normally see peppers rated using a very wide range. Jalapeños can run anywhere from 2,500 to 10,000 SHU’s.

Here are a few SHU reference points for the hot chilies you’ll commonly find in grocery stores:

  • Habanero 200,000 – 350,000
  • Cayenne 30,000 – 50,000
  • Jalapeño 3,500 – 10,000
  • Poblano 1,000 – 2,000

What Wilbur Scoville was actually measuring is the concentration of the compound, capsaicin. Capsaicin (pronounced cap-SAY-sin) is the natural chemical that gives chilies their fire. More about capsaicin in an upcoming post.

While I like a nice hot pepper spice (even when I break into a sweat), hitting the highest SHU score is not my goal. In my view, ghost peppers and the rest of those ‘super hots’ are way too fiery to enjoy since the burn overpowers the taste. Instead, I aim for a balance to allow the wonderful flavours to shine alongside the right amount of heat.

Sources and further reading


Wikipedia.org, Scoville scale

Smithsonian Magazine, How Hot is That Pepper? How Scientists Measure Spiciness, January 2013

chiliworld.com, The Scoville Heat Scale

Mexican Chilies (or chiles or chillies)

Chilies are a cornerstone ingredient in Mexican cuisine. There’s a vast array of different Mexican chilies, each with distinctive flavour and heat signatures. In this post, I’ll introduce you to some of the main types of dried chilies.

Mexican chilies. clockwise from top – Guajillo, Ancho, US penny for scale, Morita, Cascabel, Arbol

Anywhere one travels throughout Mexico, you find shops that sell chilies by the sackful. This gives a sense of the importance of the humble chili pepper in everyday cooking. The photo above shows some from the collection I picked up this past February in Puerto Vallarta.

Chili store
The chile store!

Before diving in, a note on spelling. As this post’s title indicates, there’s more than one way to spell it and they’re all correct. In Mexico, the generally used spelling is “chile”. It’s also the name of the South American country which can cause confusion (ironically Chileans – the people – are not lovers of spicy foods). In the US, the spelling “chili” is most common, while in the UK, it’s spelled “chilli”. The plural form of each is “chiles”, “chilies” and “chillies” respectively. In this post, I’ll stick with Webster’s and use the American form “chili/ chilies”.


Chipotle or Morita

chipotle or morita chilies
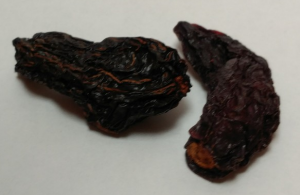
Chipotle or Morita chilis are made with ripe red jalapeños.

Moritas are more commonly known as chipotles in Canada and the Unites States. They’re ripe jalapeños smoked and dried. They deliver a wonderful combination of sweet and smoke. The heat level varies, but I count them as medium at between 5,000 and 8,000 Scovilles. “Chipotle in adobo” is a sauce made by slowly simmering these whole with onions, tomatoes, vinegar and garlic. It’s the base for my homemade BBQ sauce. The chipotle flavour inspired me to make my own Bluewater Pepper Farm Hot Smokey Chipotle. Ground into powder, this is a spice you can use in so many creative ways.

Arbol

arbol chilies
Chiles de arbol

“De arbol” means “of the tree” in Spanish. this little red pepper is fiery hot with a Scoville rating between 30,000 and 50,000. They’re similar in appearance, taste and heat to red Thai chilies. Use sparingly wherever you want a blast of extra heat.

Guajillo

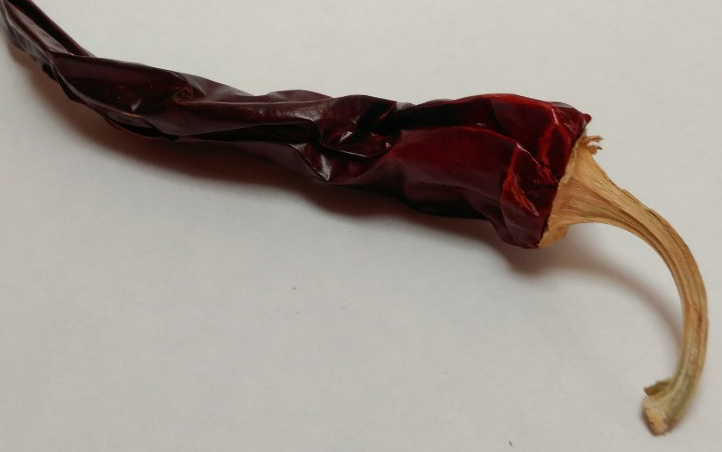
The guajillo chili has a mild to medium heat with a Scoville rating between 2,500 and 5,000. They are used in many dishes, but perhaps the best known is carne adobada. Guajillo peppers are re-hydrated and combined with vinegar, garlic, and other spices and herbs. Ground into a paste, it can be used to marinate and slow cook meat or as a delicious taco sauce.

guajillo chili

Guajillos are thin-skinned with a fruity flavour. They are the dried form of the Mirasol (looking at the sun) pepper. The name is derived from the way these peppers grow with their tips pointed up to the sky.

Ancho

ancho chili
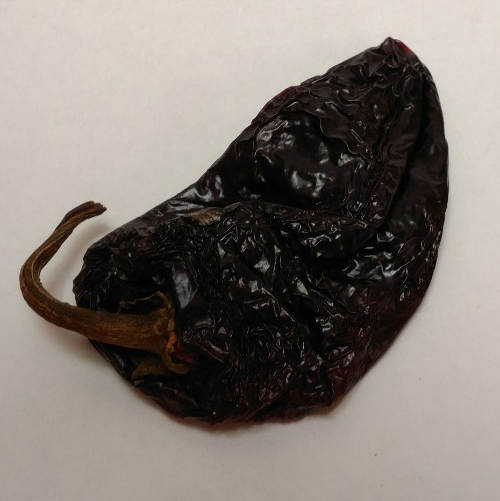
Good dried chilies should be pliable like this Ancho

The Ancho chili is one of the most versatile of the Mexican chilies. They are dried from ripe Poblano peppers which are a large heart-shaped green pepper with mild heat and a lovely fruity flavour. Ripening turns them red and they become even sweeter. Anchos are a thick-walled variety and the essential ingredient in the famous Oaxacan molé sauce.

These big peppers are great for stuffing either as Anchos (rehydrated) or in their fresh green Poblano form.

Cascabel

The sound of loose seeds in dried cascabels gives them their nick-name – the “rattle chili”. Cascabels have a distinctive nutty flavour. This thin walled, mild chili is a versatile addition to sauces, soups and stews. I use cascabels as an ingredient in my chili powder. With rating from 1,500 to 2,500 Scovilles, these are mild by comparison with moritas and arbol.

cascabel chili

What is Chipotle?

Chipotle is a traditional Mexican method to preserve jalapeño peppers using slow-smoking and drying.

In a nutshell, chipotle is a ripe red jalapeño pepper that’s smoked and dried. Hardwood smoke added to the natural sweet and heat from the pepper produces a truly amazing flavour.

This whole project started as a hobby. I’m a keen vegetable gardener. My husband and I love spicy food. Every winter we visit Mexico, the homeland of chilies where I like nothing more than exploring the local food markets.

ripe jalapenos
Ripe chipotles just started smoking

Put all that together and I’m growing a lot of peppers in my modest set of raised beds. What to do with a bumper crop? Make chipotle of course!

To be honest, if you’d asked me 10 years ago “what’s chipotle?”, you would have gotten a pretty vague answer. Now, I’m a believer (maybe even a bit obsessed).

dried chipotle chilies
. . . and here they are after I dehydrate them

As for pronunciation, check out this Youtube clip. The ‘t’ is almost silent, but not quite.

I grind mine into a powder that I use in meat rubs, fish seasoning, hummus, soups, stews and bbq sauces. Look for Bluewater Pepper Farm Hot Smokey Chipotle. A little goes a long way! You’d think the food was on the smoker for hours.